Repotting Houseplants: A Step-by-Step Guide for Beginners
As your houseplants grow, they eventually outgrow their current pots. Repotting is a crucial part of plant care, providing them with fresh nutrients and room to expand their root systems. While it might seem daunting, repotting is actually quite straightforward. This guide provides a simple, step-by-step process perfect for beginner plant enthusiasts. Understanding the basics of potting mixes and amendments is also incredibly helpful; if you’re new to this, you might find our guide to Soil Basics for Beginners: Understanding Potting Mixes & Amendments particularly useful.
Why and When to Repot
Plants are repotted for a few key reasons:
- Root Bound: The most common reason. Roots have completely filled the pot, circling around and restricting growth. You might notice roots pushing out of drainage holes.
- Nutrient Depletion: Over time, the soil loses its nutrients. Repotting provides fresh, nutrient-rich soil.
- Soil Degradation: Soil compacts over time, hindering drainage and aeration.
- Growth Stunted: If your plant’s growth has slowed significantly, it might be a sign it needs a new pot. Finding the right sunlight conditions can also help combat stunted growth; check out our guide to Sunlight Secrets: Finding the Perfect Spot for Your Indoor Plants for more details.
Gather Your Supplies
Before you begin, make sure you have everything you need:
- New Pot: Choose a pot that’s 1-2 inches larger in diameter than the current pot. Don't go too big – a pot that's drastically larger can hold too much moisture and lead to root rot. Consider the material too – terracotta pots breathe and help prevent overwatering.
- Potting Mix: Use a high-quality potting mix specifically formulated for houseplants. Avoid using garden soil, as it’s too dense. There are so many different potting mixes available, from those designed for succulents to mixes perfect for orchids. If you’re unsure where to start, our guide to Soil Basics for Beginners: Understanding Potting Mixes & Amendments will help you navigate the options. Understanding the composition of your potting mix can be just as important as the repotting process itself!
- Trowel or Small Shovel: For scooping soil.
- Gloves (Optional): To keep your hands clean.
- Watering Can: To water the newly repotted plant.
- Sharp Knife or Scissors (Optional): To trim root bound roots.
- Rooting Hormone (Optional): If you plan to propagate cuttings from your plant, rooting hormone can drastically increase your success rate.

Step-by-Step Repotting Instructions
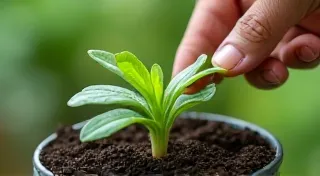
- Water Your Plant: Water your plant a day or two before repotting. Moist soil is easier to work with and less likely to damage the roots during removal.
- Loosen the Plant: Gently loosen the soil around the edges of the pot with your trowel. This helps to separate the root ball from the container walls.
- Remove the Plant: There are a couple of methods:
- Palm Method: Place your hand over the soil surface, palm down, and gently twist the pot while pulling upwards. This works best for smaller pots.
- Tap Method: Tap the sides of the pot firmly but gently to dislodge the plant. Use a butter knife to carefully pry around the edges if needed.
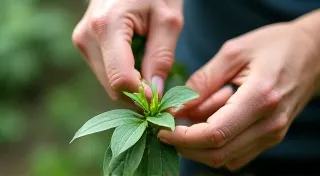
- Inspect the Roots: Carefully examine the root ball. If it’s severely root-bound (a dense, circling mass of roots), you might need to gently loosen them with your fingers or use scissors/knife to cut through some of the circling roots. This is called “root pruning”. Be careful not to damage the inner roots. Root pruning can also be beneficial if you want to later propagate your plant; knowing how to propagate houseplants can be a rewarding experience – you might want to check out our guide to Propagating Houseplants: Expanding Your Collection for Free for more ideas. For plants with particularly delicate roots, like ferns, extra care should be taken.
- Prepare the New Pot: Add a layer of potting mix to the bottom of the new pot. This ensures proper drainage and prevents the root ball from sitting too low. You can also add a layer of perlite or vermiculite for enhanced drainage.
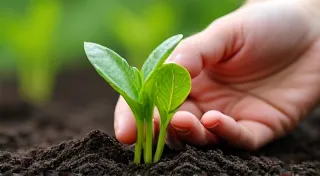
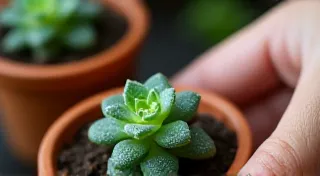
- Place in New Pot: Center the plant in the new pot, ensuring the top of the root ball is level with the rim of the pot. This prevents soil from overflowing when watering.
- Fill with Potting Mix: Fill in the space around the root ball with fresh potting mix. Gently press down to secure the plant, but avoid compacting the soil too much.
- Water Thoroughly: Water the newly repotted plant thoroughly until water drains from the drainage holes. This settles the soil and provides much-needed moisture to the roots.
- Placement: Return the plant to its original location or a spot with similar light conditions. Avoid direct sunlight for a few days to allow the plant to adjust to its new environment.
Dealing with Root-Bound Plants
If your plant is heavily root-bound, it might need more than just a slightly larger pot. Consider these steps:
- Root Pruning: As mentioned earlier, carefully trim the circling roots. Focus on removing the thickest, most tangled roots.
- Score the Root Ball: Using a knife, score the root ball in several places. This encourages new roots to grow outward. This technique, combined with root pruning, can revitalize a severely root-bound plant and give it a fresh start. You can also gently comb through the roots to loosen them further.
- Consider a Larger Repotting Cycle: If your plant is consistently root-bound, it may need to be repotted more frequently than every 1-2 years.

Post-Repotting Care
After repotting, your plant might experience some transplant shock. This is normal. Here’s what to expect:
- Reduced Growth: Growth might slow down for a few weeks. Don't be alarmed; this is a sign the plant is prioritizing root development.
- Leaf Drop: A few leaves might drop. This is usually temporary and a sign the plant is adjusting. It's particularly common in plants with large leaves.
- Avoid Fertilizing: Don't fertilize for at least 4-6 weeks, as the fresh potting mix already contains nutrients. Over-fertilizing can exacerbate transplant shock and potentially burn the roots.
- Monitor: Keep an eye on your plant for any signs of stress or disease. If you encounter any unexpected problems, remember that we have a guide to Plant First Aid: Quick Tips for Common Houseplant Emergencies that might help! Look out for signs of pests or fungal infections, which can be more prevalent in stressed plants.
- Humidity: Increasing humidity around the plant can help it recover faster from transplant shock. Consider misting regularly or using a humidifier.

Repotting is a vital part of caring for your houseplants, and with this guide, you're well on your way to keeping them healthy and thriving. Don't be afraid to experiment and learn what works best for your specific plants – every plant is unique! Happy gardening!