Pruning Houseplants: Encouraging Bushy Growth and Removing Dead Foliage
Pruning houseplants might seem daunting, but it's a vital part of plant care and a surprisingly easy process. It's not just about aesthetics; pruning encourages fuller, bushier growth, redirects energy, and removes unhealthy foliage that can harbor pests or diseases. This guide will walk you through the basics of pruning your houseplants, even if you're a complete beginner. Before you even get to pruning, though, understanding the basic needs of your plants is essential, and that starts with knowing how to correctly interpret plant labels to ensure you're meeting their specific requirements.
Why Prune Your Houseplants?
There are several key benefits to regularly pruning your houseplants:
- Encourages Bushier Growth: Pruning encourages the plant to branch out, resulting in a fuller and more compact appearance. When you cut off the end of a stem, the plant will focus on creating new buds closer to the cut.
- Redirects Energy: Removing unproductive or damaged parts of the plant allows it to focus its energy on healthy growth and flowering (if applicable).
- Removes Dead or Diseased Foliage: Pruning allows you to eliminate leaves or stems that are brown, yellow, spotted, or otherwise unhealthy. This prevents the spread of disease and pests.
- Controls Size & Shape: Pruning helps keep your plants at a manageable size and shape, especially important for those living in smaller spaces.
- Improves Air Circulation: Removing excess foliage increases airflow, reducing the risk of fungal diseases.

When to Prune
The best time to prune most houseplants is during their active growing season, typically in the spring or early summer. However, you can prune at other times of the year if necessary to remove damaged or diseased foliage. Maintaining the right balance of water is crucial during the growing season, too; improper watering can impact overall plant health. If you're struggling to keep your plants adequately watered, consider researching the ultimate guide to watering houseplants for detailed advice. Understanding the impact of light on your houseplants is also critical; sometimes, a plant's appearance can be misleading. A plant exhibiting signs of stress might need more light rather than pruning.
Signs it's time to prune:
- Brown or Yellow Leaves: Remove these to prevent disease and encourage new growth. These symptoms can also indicate nutrient deficiencies or pest infestations, so consider a soil test and thorough inspection.
- Leggy Growth: When stems are long and sparse, pruning can promote more compact growth. Often, leggy growth is a sign that a plant isn't receiving enough light.
- Dead or Damaged Stems: Cut these back to the nearest healthy node. Careful inspection of these stems might reveal the source of the damage, such as a pest infestation.
- Overcrowded Growth: Thin out dense areas to improve airflow and light penetration. This is particularly important for plants prone to fungal diseases.
How to Prune – Step-by-Step
- Gather Your Tools: You'll need sharp, clean pruning shears or scissors. Dull tools can crush stems and increase the risk of disease. Sterilize your tools with rubbing alcohol before and after pruning. Investing in good quality tools will make the pruning process much easier and contribute to healthier plants.
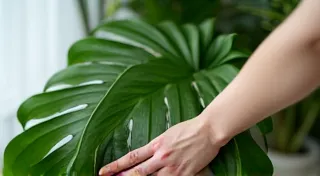
- Identify What to Prune: Carefully examine your plant. Look for dead, damaged, or yellowing leaves and stems. Also, consider whether you want to shape the plant or encourage bushier growth. Sometimes, the need for pruning isn’t obvious; careful observation is key.
- Make the Cuts: Cut just above a node (the point where a leaf or branch emerges from the stem). A node is where new growth will sprout. Cut at a slight angle, about ¼ inch above the node. The angle helps prevent water from collecting on the cut surface, reducing the risk of fungal growth.
- Remove Suckers & Watersprouts (if applicable): Some plants produce suckers (shoots that emerge from the base of the plant) or watersprouts (long, fast-growing shoots from the main stem). Remove these to redirect the plant’s energy. Understanding the difference between these growths is important; they often signify underlying issues like nutrient imbalances or stress.
- Dispose of Pruned Foliage: Don’t compost diseased foliage. Dispose of it in a sealed bag to prevent the spread of pests or diseases. Proper disposal is crucial to maintaining a healthy indoor garden.

Pruning Specific Types of Houseplants
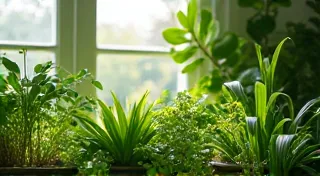
While the general principles of pruning are the same for most houseplants, some species may require slightly different approaches. It's also important to consider the specific lighting needs of your plants. If your plant isn't getting enough light, it can lead to weak growth that makes pruning less effective. For those with low-light homes, exploring best plants for low light can ensure you’re choosing varieties that thrive in your environment. The right plant for your space is the foundation of a successful indoor garden.
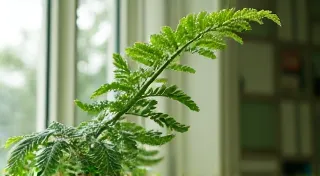
- Trailing Plants (e.g., Pothos, String of Pearls): Pinch back the tips of vines to encourage branching. This technique is particularly effective in promoting a fuller appearance in cascading plants. Regular pinching promotes a bushier habit and encourages new growth along the vines.
- Flowering Plants (e.g., African Violets, Peace Lilies): Prune after flowering to encourage new blooms. Timing is crucial for maximizing flowering potential. The window for pruning after flowering varies depending on the specific plant; research is key. For example, African Violets benefit from specific pruning techniques to maximize bloom production.
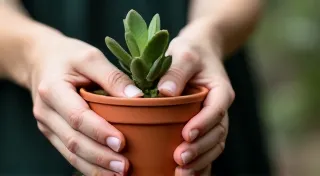
- Succulents & Cacti: Pruning is typically only necessary to remove damaged or dead parts. These hardy plants often require minimal intervention. However, removing offsets (baby plants that grow from the base) can be a way to propagate new plants.
Always research the specific needs of your plant to ensure you're pruning correctly. Furthermore, providing your houseplants with adequate space to grow is paramount. If your plant is becoming root-bound, repotting houseplants can give them the room they need to flourish. It's a good idea to periodically check the roots to avoid root-bound conditions which can severely impact the plant's health.
Important Reminders
- Don’t Over-Prune: Removing too much foliage can stress the plant. Start with small cuts and observe the plant’s response. It’re also important to consider that potting mix can degrade over time and restrict plant health. Over-pruning can leave the plant vulnerable to pests and diseases.
- Use Sharp, Clean Tools: This is crucial for preventing disease. A dull blade can crush plant tissue, creating an entry point for pathogens.
- Observe Your Plant: Pay attention to how your plant responds to pruning and adjust your technique accordingly. Each plant is different and may require slightly different pruning strategies.
- Consider the Season: While pruning is generally best in spring, adjust based on your climate and the plant's natural cycle. Plants that experience dormancy, for instance, may require less pruning during the winter months. Dormancy is a period of rest and reduced growth, so pruning should be minimized.
- Understand Node Placement: A node isn't just a point for new growth; it can also influence the direction of that growth. By strategically pruning above a node, you can subtly guide the plant’s shape and encourage growth in a specific direction. This can be particularly useful for shaping vines or encouraging branching.
- Be Patient: Don’t expect dramatic results immediately. It may take several weeks or months for a plant to fully respond to pruning. Pruning stimulates growth, but the visual results may not be immediately apparent.
- Fertilizing After Pruning: After a significant pruning, consider fertilizing the plant to help it recover and promote new growth. Fertilizing provides the plant with the nutrients it needs to support new growth.
- Propagation from Cuttings: Many houseplants can be propagated from the cuttings you take while pruning. This is a fantastic way to expand your indoor garden for free! Research the specific propagation methods for each plant.