Repotting 101: A Beginner's Guide to Giving Your Plants More Room
Welcome to the wonderful world of plant care! As your houseplants grow, they're going to need a little more space to thrive. Repotting is a crucial part of their ongoing care, but it can feel a bit daunting for beginners. Don't worry, this guide will break down the process step-by-step, making it easy and rewarding. Let's get your plants growing!
Why Repot?
There are a few key reasons why you might need to repot your houseplants:
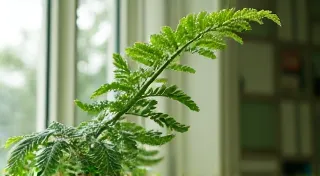
- Rootbound: This is the most common reason. Roots circling the inside of the pot restrict growth and nutrient uptake. If you are new to plant care, you might be wondering what the best plants are to start with, and considering the importance of avoiding rootbound issues, choosing easy-care options is a great starting point – check out The Best Houseplants for Beginners: Easy-Care Options to Get Started for some recommendations.
- Outgrown Pot: The plant's roots have simply filled the pot, leaving little to no room for growth.
- Poor Drainage: The old soil may have become compacted, hindering drainage and potentially leading to root rot. It's vital to address such concerns promptly to avoid plant emergencies - if you ever find yourself in a situation where your plant needs quick assistance, Plant First Aid: Quick Tips for Common Houseplant Emergencies can offer valuable insights.
- Nutrient Depletion: The existing soil has lost its nutrients, and the plant needs a fresh supply.
Signs Your Plant Needs Repotting:
- Roots growing out of the drainage holes
- Plant drying out quickly, even with frequent watering
- Slowed growth
- Pot becoming misshapen or bulging
What You'll Need
- New Pot: Choose a pot that's 1-2 inches larger in diameter than the current pot. Make sure it has drainage holes!
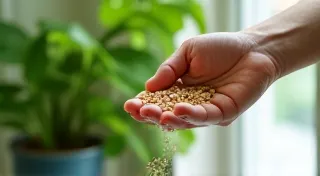
- Potting Mix: Use a high-quality potting mix specifically designed for houseplants. Don't use garden soil – it's too dense. Keeping your plant’s leaves clean and shiny is another important aspect of plant care – explore Cleaning Your Houseplants: Removing Dust and Keeping Leaves Shiny for tips on maintaining a healthy appearance.
- Trowel or Small Shovel: For scooping and moving soil.
- Gloves (Optional): To keep your hands clean.
- Watering Can: For watering after repotting.

Step-by-Step Repotting Guide
- Prepare the New Pot: Add a layer of fresh potting mix to the bottom of the new pot. The depth should be enough so that the plant sits at the same height it did in the old pot.
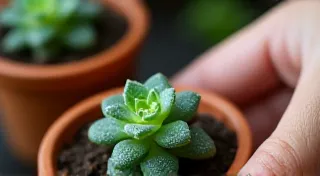
- Remove the Plant from the Old Pot: Gently loosen the soil around the edges of the pot. You can try squeezing the sides of the pot to help loosen it. If the plant is really stuck, you might need to use a knife to carefully separate the pot from the soil.
- Loosen the Roots: Once the plant is out of the pot, gently loosen the roots. If the roots are tightly bound (rootbound), you can carefully tease them apart. You can also make a few vertical cuts in the root ball to encourage new root growth.
- Place the Plant in the New Pot: Center the plant in the new pot and add more potting mix around the root ball. Fill the pot to within about 1 inch of the rim.
- Water Thoroughly: Water the plant until excess water drains from the drainage holes.
- Post-Repotting Care: Keep the plant in a location with bright, indirect light. Avoid fertilizing for a few weeks to allow the plant to adjust to its new pot and soil. Pruning your houseplants is also key to encouraging healthy, bushy growth - consider checking out Pruning Houseplants: Encouraging Bushy Growth and Removing Dead Foliage for valuable techniques.
Choosing the Right Pot
The material of the pot can also affect your plant's health.
- Terracotta: These pots are porous, allowing the soil to breathe. They're a good choice for plants that prefer drier conditions.
- Plastic: Plastic pots retain moisture better than terracotta. They're a good choice for plants that like to stay consistently moist.
- Ceramic: Ceramic pots come in a wide variety of styles and can be glazed or unglazed. Glazed pots retain moisture better than unglazed pots.

Important Considerations
- Repotting Time: The best time to repot most houseplants is during their active growing season (spring or early summer).
- Don't Overpot: Avoid using a pot that's significantly larger than the previous one, as this can lead to the soil staying too wet and causing root rot.
- Observe Your Plant: Pay attention to your plant’s needs and signs of stress. Adjust your care routine accordingly. The signs you’ve overlooked could be signs of a plant emergency – remember to refer to Plant First Aid: Quick Tips for Common Houseplant Emergencies when dealing with any distress.
Repotting can seem daunting, but it's an essential part of plant care. With a little preparation and patience, you can give your houseplants the room they need to flourish. Happy growing!